# 分布式配置中心服务端
# 概述
创建一个工程名为 hello-spring-cloud-config 的项目,pom.xml 配置文件如下:
<?xml version="1.0" encoding="UTF-8"?>
<project xmlns="http://maven.apache.org/POM/4.0.0" xmlns:xsi="http://www.w3.org/2001/XMLSchema-instance"
         xsi:schemaLocation="http://maven.apache.org/POM/4.0.0 http://maven.apache.org/xsd/maven-4.0.0.xsd">
    <modelVersion>4.0.0</modelVersion>

    <parent>
        <groupId>com.starmcc</groupId>
        <artifactId>hello-spring-cloud-dependencies</artifactId>
        <version>1.0.0-SNAPSHOT</version>
        <relativePath>../hello-spring-cloud-dependencies/pom.xml</relativePath>
    </parent>

    <artifactId>hello-spring-cloud-config</artifactId>
    <packaging>jar</packaging>

    <name>hello-spring-cloud-config</name>
    <url>http://www.starmcc.com</url>
    <inceptionYear>2019-Now</inceptionYear>

    <dependencies>
        <!-- Spring Boot Begin -->
        <dependency>
            <groupId>org.springframework.boot</groupId>
            <artifactId>spring-boot-starter-web</artifactId>
        </dependency>
        <dependency>
            <groupId>org.springframework.boot</groupId>
            <artifactId>spring-boot-starter-tomcat</artifactId>
        </dependency>
        <dependency>
            <groupId>org.springframework.boot</groupId>
            <artifactId>spring-boot-starter-actuator</artifactId>
        </dependency>
        <dependency>
            <groupId>org.springframework.boot</groupId>
            <artifactId>spring-boot-starter-test</artifactId>
            <scope>test</scope>
        </dependency>
        <!-- Spring Boot End -->

        <!-- Spring Cloud Begin -->
        <dependency>
            <groupId>org.springframework.cloud</groupId>
            <artifactId>spring-cloud-config-server</artifactId>
        </dependency>
        <dependency>
            <groupId>org.springframework.cloud</groupId>
            <artifactId>spring-cloud-starter-netflix-eureka-server</artifactId>
        </dependency>
        <!-- Spring Cloud End -->
    </dependencies>

    <build>
        <plugins>
            <plugin>
                <groupId>org.springframework.boot</groupId>
                <artifactId>spring-boot-maven-plugin</artifactId>
                <configuration>
                    <mainClass>com.starmcc.hello.spring.cloud.config.ConfigApplication</mainClass>
                </configuration>
            </plugin>
        </plugins>
    </build>
</project>
1
2
3
4
5
6
7
8
9
10
11
12
13
14
15
16
17
18
19
20
21
22
23
24
25
26
27
28
29
30
31
32
33
34
35
36
37
38
39
40
41
42
43
44
45
46
47
48
49
50
51
52
53
54
55
56
57
58
59
60
61
62
63
64
2
3
4
5
6
7
8
9
10
11
12
13
14
15
16
17
18
19
20
21
22
23
24
25
26
27
28
29
30
31
32
33
34
35
36
37
38
39
40
41
42
43
44
45
46
47
48
49
50
51
52
53
54
55
56
57
58
59
60
61
62
63
64
主要增加了 spring-cloud-config-server 依赖
<dependency>
    <groupId>org.springframework.cloud</groupId>
    <artifactId>spring-cloud-config-server</artifactId>
</dependency>
1
2
3
4
2
3
4
# Application
通过 @EnableConfigServer 注解,开启配置服务器功能
@SpringBootApplication
@EnableConfigServer
@EnableEurekaClient
public class ConfigApplication {
    public static void main(String[] args) {
        SpringApplication.run(ConfigApplication.class, args);
    }
}
1
2
3
4
5
6
7
8
2
3
4
5
6
7
8
# application.yml
增加 Config 相关配置,并设置端口号为:8888
spring:
  application:
    name: hello-spring-cloud-config
  cloud:
    config:
      label: master
      server:
        git:
          uri: https://github.com/topsale/spring-cloud-config
          search-paths: respo
          username:
          password:

server:
  port: 8888

eureka:
  client:
    serviceUrl:
      defaultZone: http://localhost:8761/eureka/
1
2
3
4
5
6
7
8
9
10
11
12
13
14
15
16
17
18
19
20
2
3
4
5
6
7
8
9
10
11
12
13
14
15
16
17
18
19
20
相关配置说明,如下:
spring.cloud.config.label:配置仓库的分支spring.cloud.config.server.git.uri:配置Git仓库地址(GitHub、GitLab、码云 ...)spring.cloud.config.server.git.search-paths:配置仓库路径(存放配置文件的目录)spring.cloud.config.server.git.username:访问Git仓库的账号spring.cloud.config.server.git.password:访问Git仓库的密码
注意事项:
- 如果使用 GitLab 作为仓库的话,
git.uri需要在结尾加上.git,GitHub 则不用
# 在 Gitlab / GitHub 上创建配置
以 Github 为例,创建项目,并创建一个respo文件夹
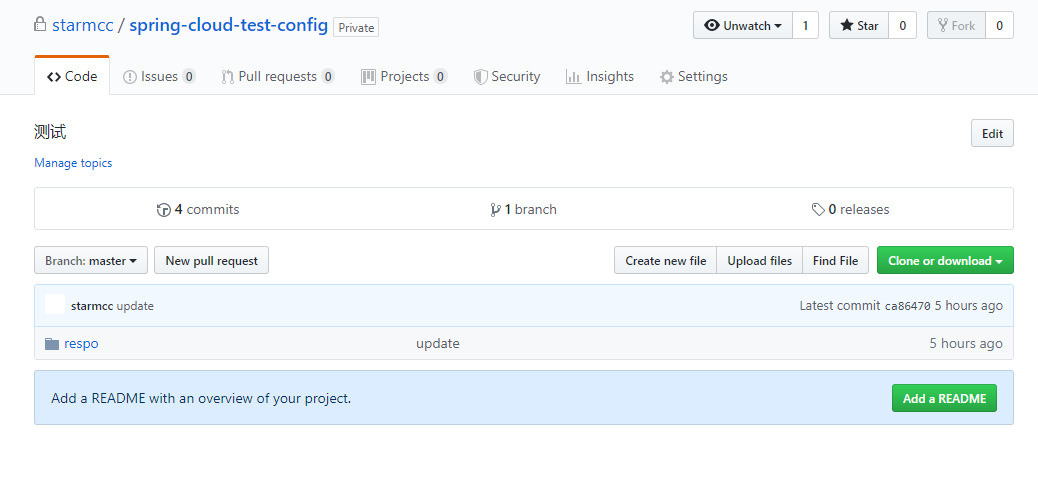
在文件夹中将之前的Netflix当中使用的feign为例的服务的application.yml配置文件复制出来,并更名如下格式:

web-admin-feign-dev.yml最后的dev表示开发环境web-admin-feign-prod.yml最后的prod表示生产环境
# 测试
浏览器端访问:http://localhost:8888/web-admin-feign/dev/master 显示如下:
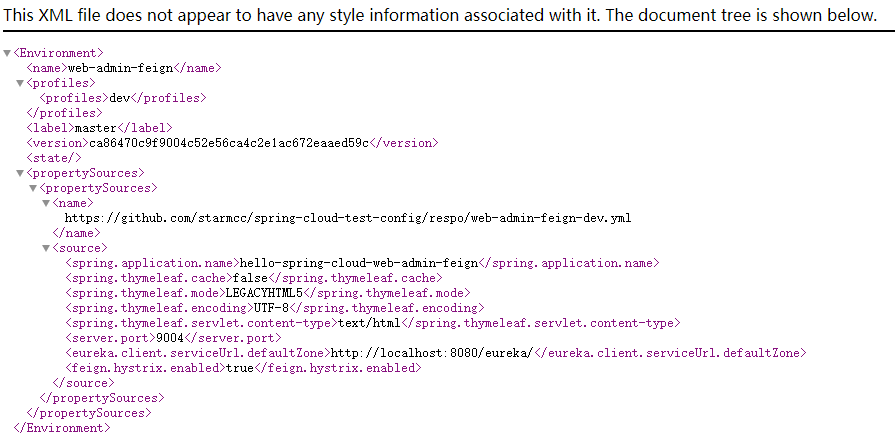
证明配置服务中心可以从远程程序获取配置信息
# 附:HTTP 请求地址和资源文件映射
http://ip:port/{application}/{profile}[/{label}]http://ip:port/{application}-{profile}.ymlhttp://ip:port/{label}/{application}-{profile}.ymlhttp://ip:port/{application}-{profile}.propertieshttp://ip:port/{label}/{application}-{profile}.properties
← 分布式配置中心 分布式配置中心客户端 →